Twinspect 2024.6.0 Release Notes

Digital Bridge Inspection: The Role of Digital Twins and Technological Advancements
8. Mai 2024
Twinspect 2024.7.0 Release Notes
24. Juli 2024Key new features overview Enhance your inspection experience with our latest updates:
1. Georeferenced 3D models: Upload models with accurate spatial information for precise alignment.
2. Project map view: Access a comprehensive map showcasing your model's location, related images, annotations, and AI detections.
3. Redesigned PDF template: Enjoy cleaner, more readable reports with our improved PDF layout.
4. Customizable project settings: Save your preferred settings for appearance and functionality, ensuring consistency across projects.
5. Annotations and AI indicators: Easily identify manual annotations and AI detections with new image indicators.
6. Enhanced image overview: Simultaneously view all annotations and detected damages on an image for detailed analysis.
7. Checkmark images: Mark images as reviewed to guarantee no detail is overlooked.
8. Additional map modes: Switch between standard and satellite views to better assess your project assets.
9. Original filenames: Download images with their original filenames for easier organization.
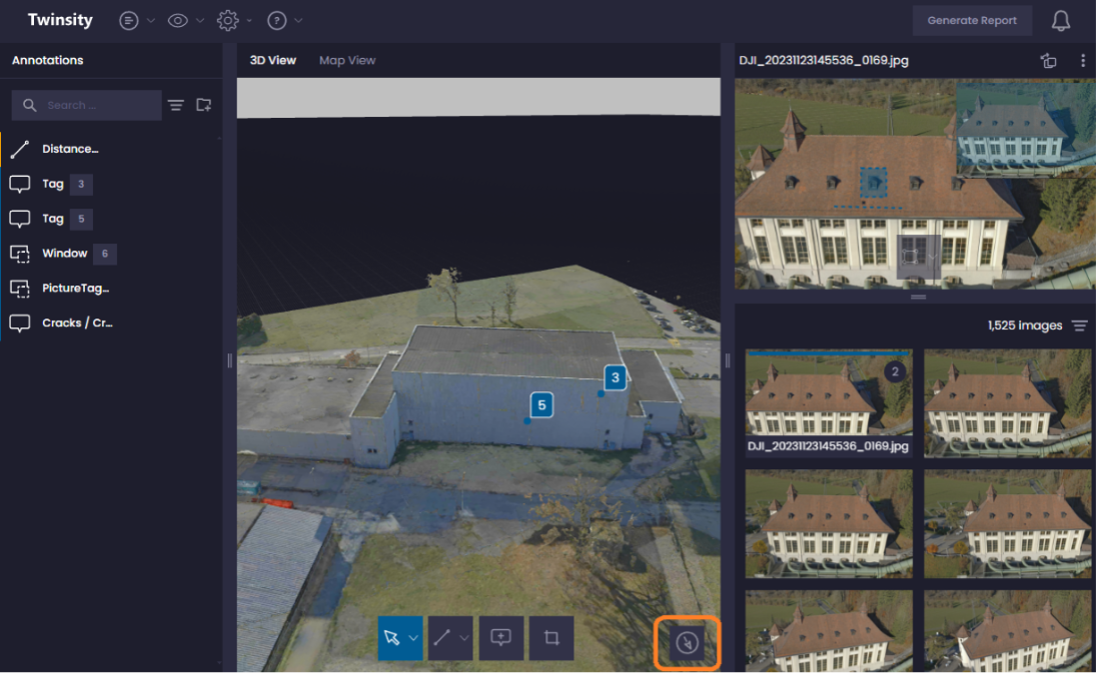
10. Compass for 3D scene: Navigate your 3D models more intuitively with a compass that indicates north, enhancing spatial orientation within the digital twin environment.
These features are tailored to boost your project's precision and efficiency, providing a seamless and more controlled inspection process.
Feature 1: Import georeferenced 3D models
We are excited to announce that you can now upload georeferenced 3D models to our platform! This enhancement allows your models to include accurate spatial information and coordinates, enabling alignment with other geographic data and facilitating spatial analysis.
How to Upload a Georeferenced Model:
1. Specify the Spatial Reference System (SRS):
· Define the coordinate system and datum for your model.
· Use a Projected Coordinate System (PCS), such as EPSG 32633 (UTM Zone 33N).
2. Export with the Specified SRS:
· Ensure your reconstruction software exports the model with the specified Spatial Reference System.
· For detailed instructions, refer to the Twinsity-SRS-Manual.
Important Note:
Even if your model is not exported as georeferenced, our new feature in Twinspect can still generate a valid SRS. The only requirement is that Twinspect creates a Twinsity SRS. For this, the images used to create the model must contain GPS positions in their EXIF data as usual.
Feature 2: Project map view
Introducing the Project Map View! If you have a georeferenced model in your project, you can now access a map displaying the location of your model and the images used to create it.
Key Benefits
Visualize Your Model: See the exact location of your georeferenced model on the map.
Image Overview: View the images that contributed to the model creation.
Annotations and AI Detection: Observe annotations and AI detection results directly on the map.
Data Insight: Gain a comprehensive overview of your data, making it easier to identify issues or gaps.
Additionally, the Project Map is available in Twinspect Express, providing an overview of your images even without a georeferenced model.

Feature 3: Redesigned PDF template
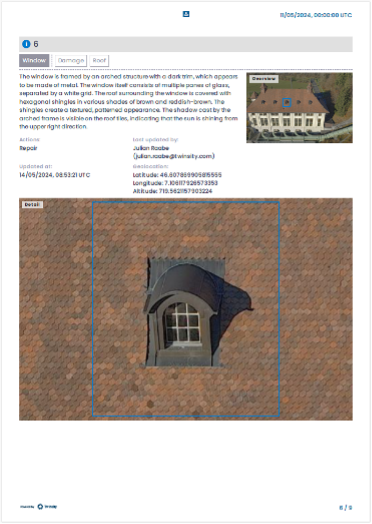
We are pleased to introduce our redesigned PDF template, enhancing the layout and quality of the PDF reports generated from your projects.
Key Improvements
Enhanced Image Quality: Detailed images of your annotations are now clearer and more precise.
Overview Image: Each report includes a smaller overview image showing the location of each annotation on the model.
Comprehensive Annotation Details: All relevant details of each annotation, including title, description, and GPS coordinates, are now included.
Improved Communication: Easily share and communicate your findings and insights with stakeholders using the updated, high-quality PDF reports.
These improvements ensure that your reports are more informative and visually appealing, making it easier to convey important information.
Feature 4: Save project and app settings
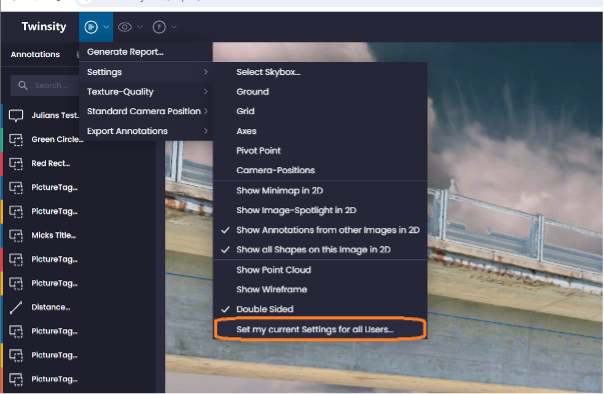
We are excited to introduce the ability to customize and save the appearance and functionality of your projects for all users according to your preferences and needs.
Customization Options
If you have project management permissions, you can access the project settings menu and choose from a variety of options, such as:
Skybox: Select the background image for your 3D models from a range of presets.
Ground: Toggle the visibility of the ground plane and adjust its height and color.
Double-Sided Rendering: Enable or disable the rendering of textures on the backside of your models.
These settings will apply to all users who view or edit your projects and apps, ensuring a consistent and optimal experience for everyone.
Feature 5: Annotation and AI indicators per image
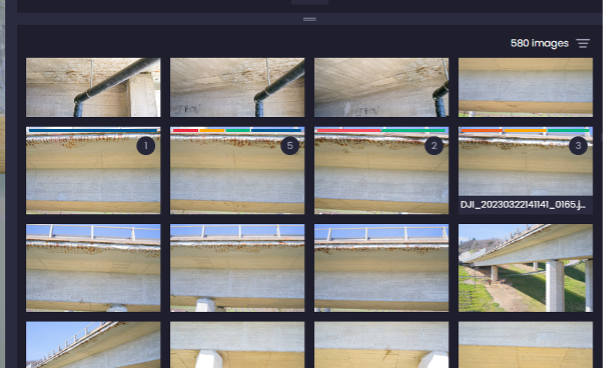
Twinspect now displays indicators for annotations and AI detections on each image in the image list.
Key Benefits
Quick Assessment: Easily identify which images have defects marked by humans or AI without opening each image individually.
Timesaving: Streamline your workflow by quickly spotting important images.
Enhanced Inspection Quality: Improve the quality of your inspection reports with this efficient overview.
This feature helps you save time and ensures a higher standard of inspection by allowing you to focus on the images that matter most.
Feature 6: Improved overview of annotated images
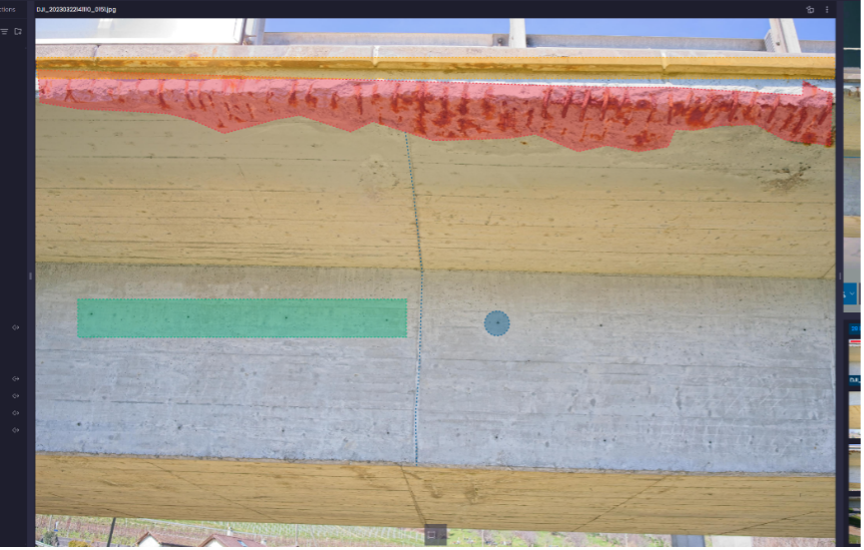
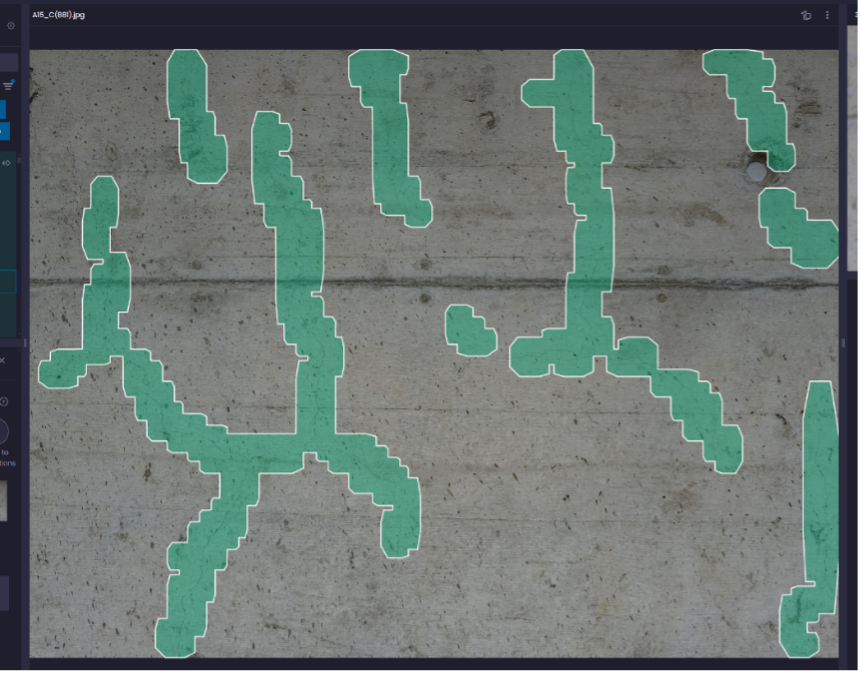
Twinspect now provides a comprehensive view of all annotations on an image, including AI-detected damages.
Key Features
Simultaneous Annotations: View all human and AI annotations on an image at the same time.
Enhanced Insight: Easily identify important details and compare human and machine annotations.
Annotation Layers: Toggle between different annotation layers for a customized view.
Zoom Functionality: Zoom in or out of the image for a better perspective.
This improvement allows you to quickly gain insights and compare results, enhancing your ability to analyse and assess images effectively.
Feature 7: Checkmark images
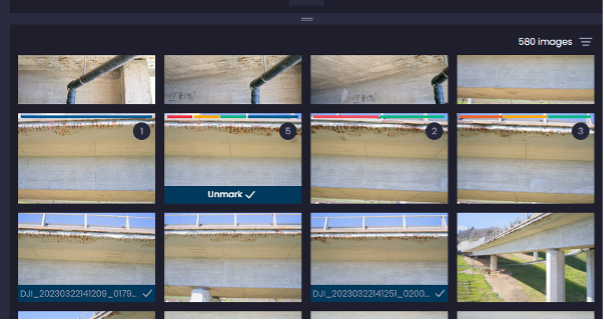
To ensure a thorough inspection process, Twinspect now allows you to mark each image as inspected with a simple click.
Key Benefits
Track Progress: Easily keep track of which images have been inspected to avoid overlooking any important details.
Inspection Status Filtering: Filter images by their inspection status to focus on those that still need attention.
Compliance and Quality Assurance: Document and verify your work for compliance and quality assurance purposes.
This feature is designed to help you manage your inspection process more efficiently and ensure that no image is missed.
Feature 8: Additional map modes
We are pleased to introduce additional map modes in Twinspect, enhancing your ability to visualize project assets, images, and inspection data.
Key Features
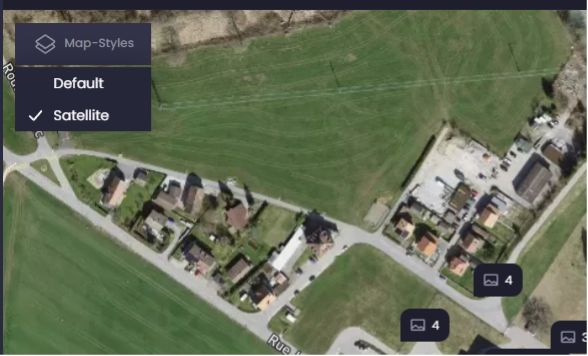
Satellite Map Mode: Switch to satellite map mode to see the location and distribution of your project assets on a satellite map.
Enhanced Terrain and Environment View: Gain a better sense of the terrain, environment, and spatial relationships among your data.
Data Overlay: Easily overlay your data on top of satellite images for a more realistic and comprehensive view.
Versatile Use: This feature is useful for planning, monitoring, and reporting purposes, providing a detailed perspective of your project area.
These additional map modes give you the flexibility to view your data in the context that best suits your needs.
Feature 9: Download image with original filename
Twinspect now allows you to download images with their original filenames, enhancing data management and organization.
Key Benefits
Maintain Data Integrity: Preserve the original filenames to keep track of your data sources accurately.
Avoid Confusion: Prevent confusion or duplication by saving and sharing images with their original names.
Improved Data Management: Easily manage your images without losing important filename information.
This feature helps you maintain clarity and organization when handling your image data.
Feature 10: Compass for 3D scene
Enhance your experience with Twinspect using the new compass for the 3D scene.
Key Features
Directional Orientation: See the north direction in the 3D space to better orientate yourself and navigate through your digital twin.
Dynamic Rotation: The compass, located at the bottom right corner of the screen, rotates as you move the camera, providing continuous orientation.
This feature improves your ability to navigate and understand the spatial orientation of your 3D models, making your Twinspect experience more intuitive and efficient.
